|
|
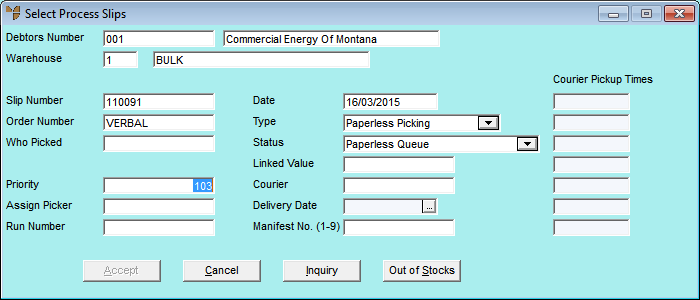
Debtors Number
|
Micronet displays the debtor ID and name for the order.
|
|
|
Warehouse
|
Micronet displays the warehouse that the order is to be supplied from.
|
|
|
Slip Number
|
Micronet displays the picking slip number.
|
|
|
Order Number
|
Micronet displays the order number.
|
|
|
Who Picked
|
If the order has already been picked, Micronet displays the user ID of the picker.
|
|
|
Priority
|
Micronet displays the priority assigned to this picking slip. You can move the slip higher up the queue by entering a lower number (e.g. 1), or you can move the slip lower down the queue by entering a higher number (e.g. 50).
|
|
|
Assign Picker
|
To assign a specific picker to this picking slip, enter the user ID of that picker or press spacebar then Enter to select from a list of Micronet users. When you assign a picker, the slip can only be downloaded by PDAs that have that user logged in.
|
|
|
Run Number
|
Micronet displays the debtor's default run number for standing orders from the Debtors master file – see "File - Debtor - Debtor". You can change this if required.
For more information on standing orders, see "Sales - Standing Orders".
|
|
|
Date
|
Micronet displays the date on which the order was created.
|
|
|
Type
|
The type of picking slip which may be one of the following:
- Paperless Picking – the slip was created in the Sales Force module on a PDA, in Micronet Online Ordering, or in an external web ordering system that is linked to Micronet via Data.Connect. It may also have been created in Micronet Invoice Creation and posted paperless.
- Slip – the slip was created in Micronet and requires printing out and manual picking.
|
|
|
Status
|
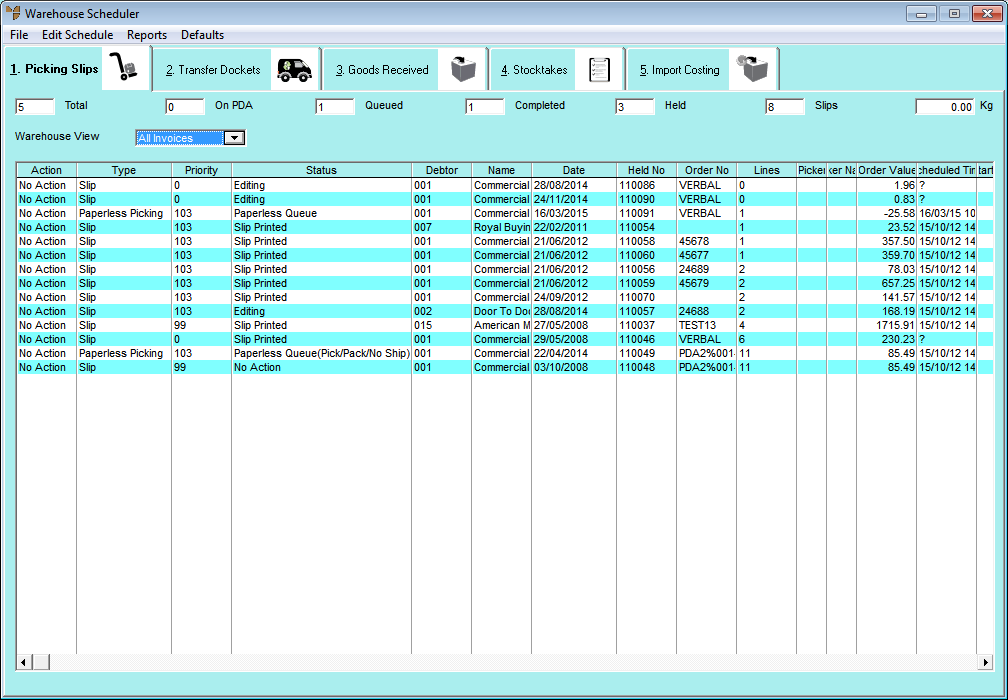
Micronet displays the picking slip status. For more information on picking slip statuses, see "Viewing or Changing the Status of a Picking Slip (v2.7)".
|
|
|
Linked Value
|
Micronet displays any other picking slips to which this picking slip is linked. For more information, see "Linking Picking Slips for Picking".
|
|
|
Courier
|
Micronet displays the ID of any courier assigned to this order. You can press spacebar then Enter to select a courier.
If a courier is selected in this field, Micronet assigns the slip the default initial priority for that courier if:
- the courier has been assigned a default priority in the Couriers master file – see "Adding a New Courier", and
- the Switch Debtor/Courier field is set to Yes on the Edit Warehouse Mobile Settings screen in your company configuration – see "General Settings".
|
|
|
Delivery Date
|
Enter or select the delivery date for the order.
|
|
|
Manifest No. (1-9)
|
Enter the number of the delivery manifest for this order. For more information about delivery manifests, refer to "Edit Schedule - Special - Build Manifest (v2.7)".
|
|
|
Courier Pickup Times
|
Micronet displays the estimated closing times of couriers starting from Monday and continuing through to Sunday as entered in the Couriers master file – see "Couriers Master File". Micronet uses these to determine the priority of couriers in the Warehouse Scheduler. That is, slips are picked in accordance with the remaining open couriers. You can enter or change these if required.
|